Vessel position and mooring lines
On this tab you will see the domain as a background layer with the earlier declared bollards and fenders. The toolbar grants you the necessary functionality to insert the vessel into the domain as desired.
Position vessel
The vessel position is provided according to a given Map projection. The following rules apply:
· If: projection of the domain file equals Local coordinates
Then: you must to provide the vessel position with respect to Local coordinates
· If: projection of the domain file does not equal local coordinates
Then: you can specify the vessel position with respect to any Map projection, except Local coordinates
The position type reflects which reference point on the vessel you insert into the domain. For the moment we only support 'amidship in domain'.
Rotation type reflects how the vessel rotation is to be interpreted. For the moment we only support 'Counter clockwise from Easting', meaning this is the convention for a positive rotation value.
When clicking Apply, the specified state for vessel position and rotation will be effectuated. If editing the latest specified state for position and rotation, the Apply button will be active again (indicating that a new state has been declared).
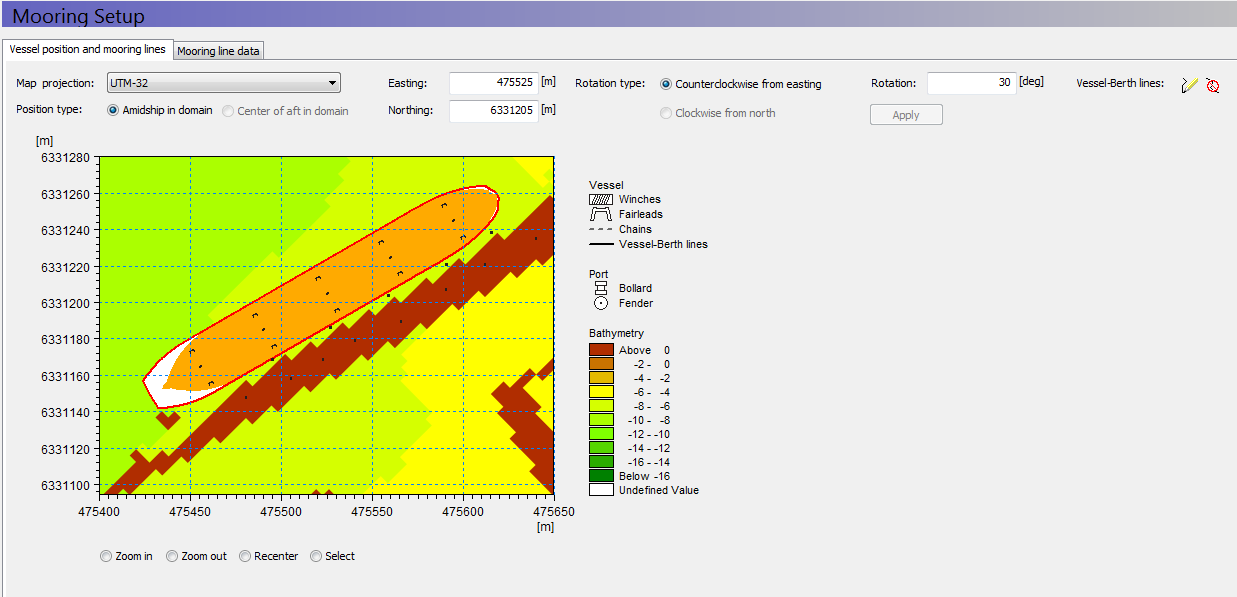
When finished positioning the vessel, you should see the vessel meaningfully positioned somewhere in the Domain/Berth layout. An example view is given in Figure 1.6.
Figure 1.6 Example of vessel position with defined spatial characteristics
When the vessel position in the domain is considered acceptable, the mooring line arrangement is ready to be declared.
Two icons exist for the insertion and deletion of Vessel-Berth lines:
· Insert line ![]()
· Delete line ![]()
A single Vessel-Berth line can be inserted by doing these steps:
1. Click the insert line icon
2. Initiate the line by clicking any given winch on the vessel
3. Move the cursor to any given fairlead on the same vessel as the winch selected in step 2, and click on the fairlead
4. Continue moving the cursor to any given bollard
5. Finalize the mooring line by clicking on the bollard
If lines are specified incorrectly, they can be deleted at any time by clicking the delete line icon and subsequently clicking on the graphical symbol representing the full vessel-berth line. Figure 1.7shows an example for inserting mooring lines.
This plot offers an interactive feature, allowing you to select (by clicking) on any given Vessel-Berth Line. The data record for the selected line will then be displayed in the lower part of the dialog, and you can then edit the property of the selected line. This functionality is useful when you need to set the correct line and tail profile, and line pretension and tail length for each spatial line.

Note: Advanced interactive features like Pan and Mouse Wheel based zoom, are available for the most flexible work flow. The features can be utilized during any graphical activity: vessel-berth line insertion/deletion, selection of attributes or when certain details are to be looked up and inspected. These two features become active when you click on the plot and hold down the shift key on the keyboard.
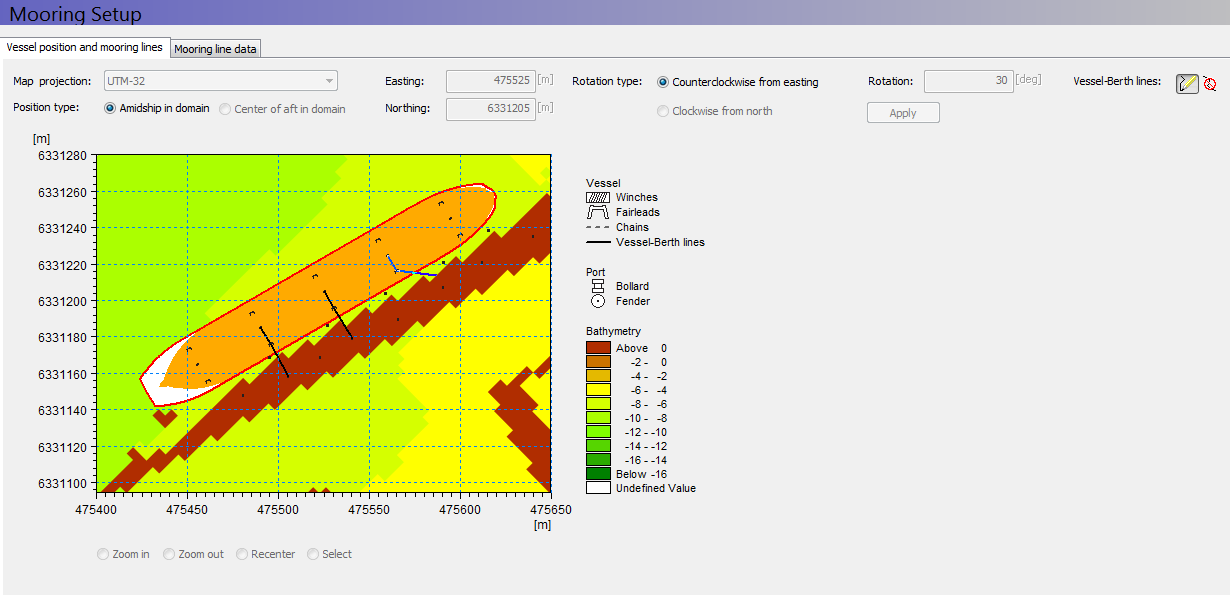
Figure 1.7 Example of inserting mooring lines
![]()