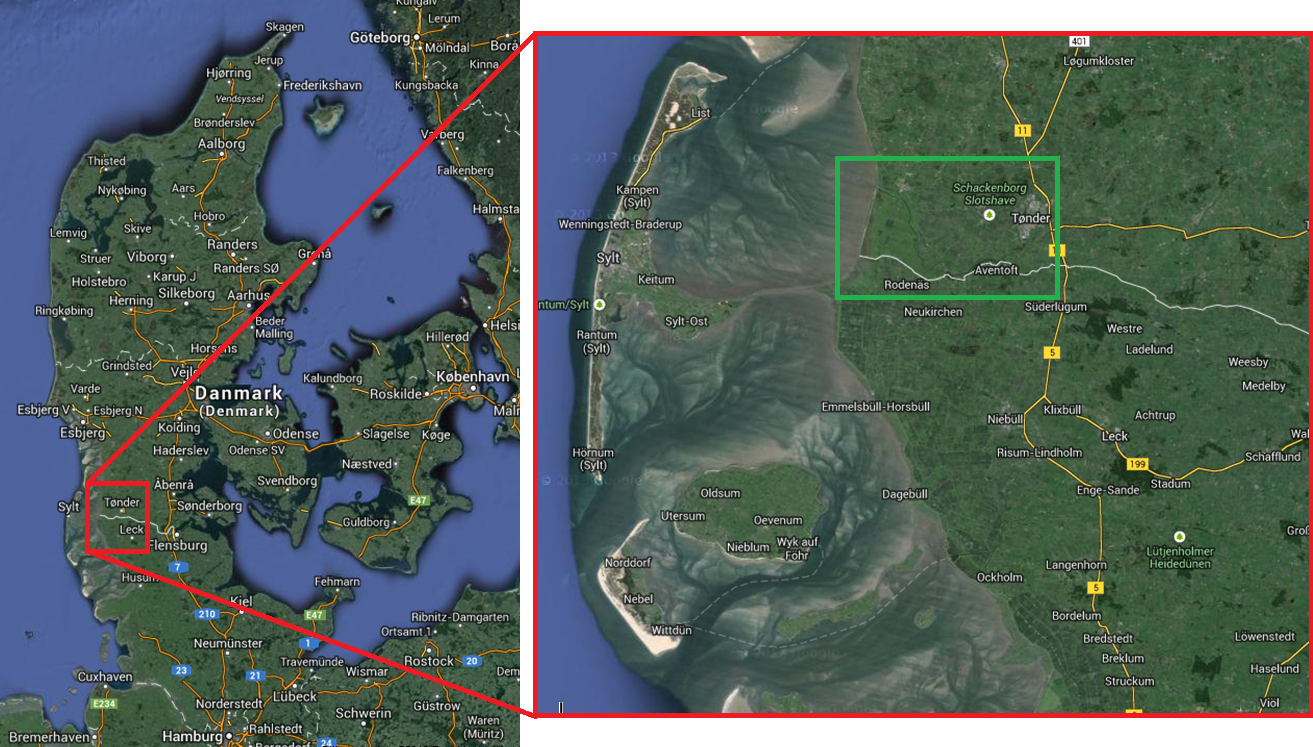
Zoom to the area of Vid-Aa in Denmark see green box in Figure 3.3. Note the location is not important for the exercise, hence any position can be used.
Define a branch using the ‘Branches’ ribbon in the Map view. Select ‘Add’ and digitise the branch on the map by clicking on the most upstream location and then clicking once on the map for each bend until the most downstream location. On the last point finish the branch with a double-click.
In the Tabular view of the branches define the branch name to ‘Main’ and set the Topo ID to 2014.
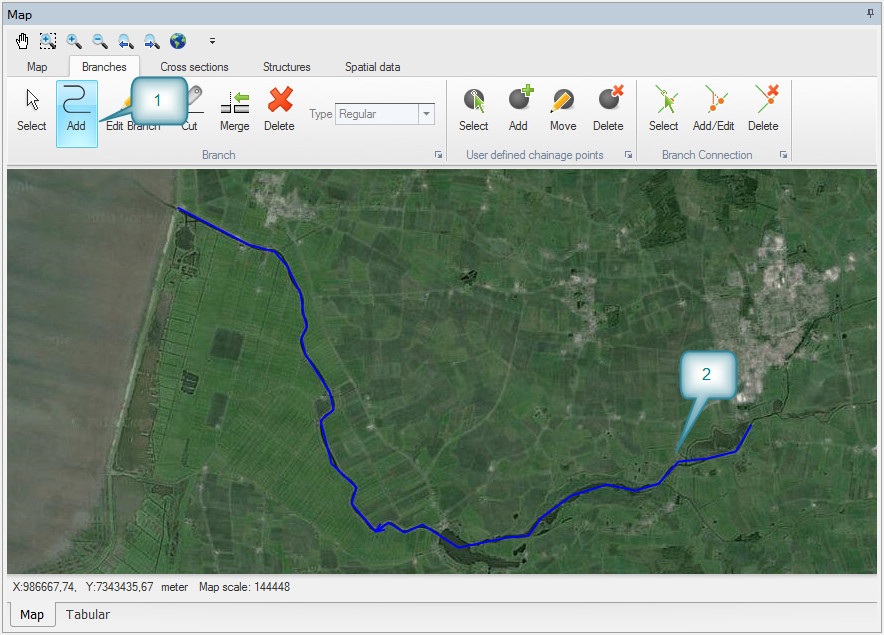
Figure 3.4 Define a branch
Once a branch is defined the chainages along the branch is automatically calculated based on the distance from the first point. The default chainage of the first point in a branch is zero. The calculated chainages may not be optimal and the user may wish to set the chainage manually. This is done by inserted user defined chainage points.
Insert a user defined chainage point at the first and last end by using the ‘Branches’ ribbon and ‘Add’ for a user defined chainage point. If the point is not placed at the end the point can later be moved by using ‘Move’ and dragging the point to the end of the branch.
Go to the Branches page in Tabular view and the User defined chainage points tab to defined the chainages. Here we define the first point to have chainage 0 and the last to chainage 40000.
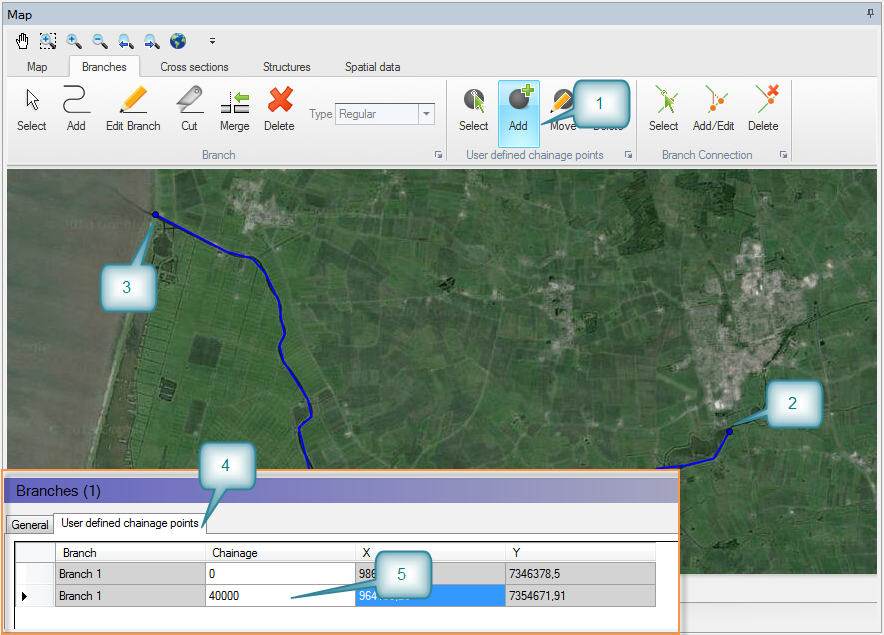
Figure 3.5 Define user defined chainage points
Branches can be linked together through branch connections. Define a tributary to your main branch in the same way as before - again starting with the upstream point and ending with the downstream point.
Set the branch name to ‘Tributary’ and the Topo ID to 2014.
If the last point is located very close to the main branch it may automatically connect, but if not automatically connected the branches should be manually connected. Select the ‘Branches’ ribbon and ‘Add/Edit’ branch connections. First click on the last point in the tributary and drag the cursor to the point on the main branch where the tributary should connect. When a connection is possible the cursor turns to a black circle and the branch is selected. Releasing the mouse button will create the connection which is shown with a connection line.

Figure 3.6 Define branch connections
![]()